Containerized X11 Applications
Containers1 are great. They provide us means to isolate applications by leveraging Linux namespaces2. We can run any kind of application under containers, including X113 applications.
X11 applications are essentially applications with GUI’s that use X. While applications like standard Linux utilities can be easily run under containers since they tend to have minimal dependencies, X11 applications on the other hand, can be a bit more difficult to do so.
Main dependency of X11 applications are an X server which they can talk to. While it is doable to run fully fledged X server inside a container, it is also possible to expose host X11 socket to container. The latter would decrease a good amount of dependency and let us to see the application window in our host X system where we are currently at. For this exercise, we will use Docker4 to containerize Discord application.
Creating the container image
In order to create our container image, we must first choose a base image. Since Discord provides a deb
format package, we can opt for any Debian based image for our starting point. To keep it minimal, the
debian:buster-slim5 image can be used. From here on, we can proceed to install our package as usual in a
Debian environment.
FROM debian:buster-slim

COPY discord.deb /tmp/discord.deb
RUN \
    apt-get update && \
    apt-get install --no-install-recommends --yes \
        /tmp/discord.deb && \
    rm /tmp/discord.deb
Ideally, package maintainers should specify all dependencies for the application in their package format. The
apt package manager would install all required dependencies listed in package. In case of any missing
dependencies, It is good practice to issue ldd command to find out any missing shared library dependencies,
and install their corresponding packages. For our case, packages missing below were added to our Dockerfile.
# Install missing dependencies.
RUN \
    apt-get install --no-install-recommends --yes \
        libx11-xcb1 \
        libxcb-dri3-0 \
        libatk-bridge2.0-0 \
        libgtk-3-0 \
        libdrm2 \
        libgbm1
Now we have that our Dockerfile prepared, we can build it.
[0] [00:01] [can@homebook discord]
$ ls -1
discord.deb
Dockerfile
[0] [00:02] [can@homebook discord]
$ docker build -t discord:0.0.13 .
...
Successfully tagged discord:0.0.13
Running the container with X
By design an X server can communicate with clients over either unix domain sockets or TCP sockets. In this context, the client would be our X11 application that will run under container. Hence, It’s called X server.
Traditional Unix operating systems have /tmp/.X11-unix/ directory where the X server stores it’s unix
domain sockets under. The naming format of these sockets are X<n>, where n is the display number of the
server. This display number is stored via environment variable DISPLAY.
[0] [00:03] [can@homebook discord]
$ ls -1 /tmp/.X11-unix/
X0
[0] [00:04] [can@homebook discord]
$ echo $DISPLAY
:0.0
We can feed this socket file to our container by --volume argument and set DISPLAY environment variable
by --env argument. Before we go ahead and run our application there is one more point to be made.
The X has server access program called xhost which is used to manage users that are allowed to make
connections to the X server. Because Docker containers by default run with root user and xhost does not
allow root user to make connection to X server, the client application would fail to start. For this reason,
we have to match the container user with our host user by --user argument.
[0] [00:05] [can@homebook discord]
$ mkdir -p /home/can/.config/discord # create config directory for the application
[0] [00:06] [can@homebook ~]
$ id -u
1000
[0] [00:07] [can@homebook discord]
# --no-sandbox because this is an electron application and we already are in a container
# --no-xshm because docker containers by default run in different IPC ns
$ docker run -it --rm \
    --volume /tmp/.X11-unix/X0:/tmp/.X11-unix/X0 \
    --volume /home/can/.config/discord:/home/can/.config/discord \
    --env DISPLAY=:0 \
    --env HOME=/home/can \
    --user 1000 \
    discord:0.0.13 /usr/share/discord/Discord --no-sandbox --no-xshm --disable-dev-shm-usage
Discord 0.0.13
...
At this point we should be able to see our Discord application being rendered in our host X server.
Running the container with PulseAudio (optional)
The X socket is only for graphical rendering and not for sound. So, with the current stage of our application, we would have no sound. If we would like to have sound from a containerized X11 application, we can introduce PulseAudio6 sockets to our container for sound communication. PulseAudio is also a server, like X, where it can communicate over unix domain sockets.
Make sure that we have PulseAudio client library package installed in our container.
# Install pulseaudio client library.
RUN \
    apt-get install --no-install-recommends --yes \
        libpulse0
We can issue below command to tell PulseAudio create an unix domain socket.
[0] [00:06] [can@homebook ~]
$ pactl load-module module-native-protocol-unix socket=/tmp/pulseaudio.socket
We can feed this socket into our container and set PULSE_SERVER environment variable pointing to this
socket to make our X11 application aware of this.
[0] [00:08] [can@homebook discord]
$ docker run -it --rm \
    --volume /tmp/.X11-unix/X0:/tmp/.X11-unix/X0 \
    --volume /home/can/.config/discord:/home/can/.config/discord \
    --volume /tmp/pulseaudio.socket:/tmp/pulseaudio.socket \
    --env DISPLAY=:0 \
    --env HOME=/home/can \
    --env PULSE_SERVER=unix:/tmp/pulseaudio.socket \
    --user 1000 \
    discord:0.0.13 /usr/share/discord/Discord --no-sandbox --no-xshm
Discord 0.0.13
...
At this point both our speaker and microphone should be available to our containerized application.
Integrating application shortcuts (optional)
Calling docker run each time we want to run our containerized X11 application is a bit hassle. Instead of
this, we can integrate shortcuts using XDG Desktop Entry specification7. Assuming that we have a shell
script file containing necessary commands at /opt/discord/run.sh, we can create a desktop entry at
~/.local/share/applications/discord.desktop like below.
[Desktop Entry]
Name=Discord
Comment=All-in-one voice and text chat for gamers that's free, secure, and works on both your desktop and phone.
GenericName=Internet Messenger
Exec=/usr/bin/pkexec sh /opt/discord/run.sh
Icon=discord
Type=Application
Categories=Network;InstantMessaging;
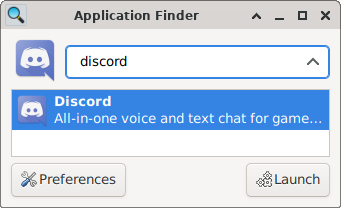
This would integrate with applications honoring XDG Desktop Entry specification. An example with
xfce4-appfinder would be like below.

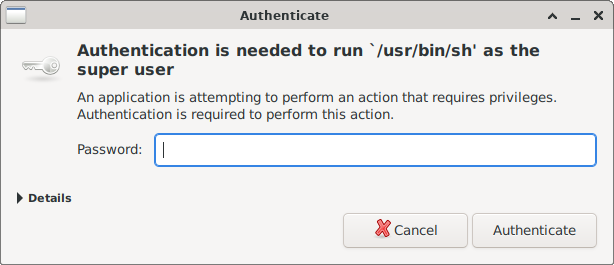
The pkexec command we wrote would allow script to gain root privileges when running the application, since
docker by default, needs root user permissions to operate. This would prompt you to enter your user password,
similar to sudo.

Conclusion
The final version of this exercise can be found at here. To keep things organized, I wrap shell scripts inside a Makefile. You can extract them to your liking.
The main advantage of this for me would be filesystem isolation8, which lets me to not touch my host system’s packages. I tend to keep a minimal amount of packages in my host system. Some X11 applications might have large number of dependencies which you may want to avoid.
The containerization of X11 applications can be useful in case of
- The Linux distro does not offer the application
- Incompatible dependencies
- Running multiple versions of it
- Trying out the application without installing it
- Restricting the application
It should be noted that also solutions like Snap/Flatpak/AppImage can be used. I prefer not to have yet another package manager in my system.